Any and all advice, guides, and reviews are unbiased and based on my personal experience. If you buy through affiliate links, I may earn commissions, which helps support my website. This does not have an impact on posts or my opinion of any reviewed products. If you find this post helpful and want to say thanks, please buy me a coffee or take a look at my book on Amazon. It keeps this page ad-free. Thank you!
If you own a Desktop PC or Gaming Rig, whether it is a custom-built rig or something off-the-shelf, you more than likely have an expensive graphics card and other components. If you want to protect the internals of your gaming PC when you move, prevent your graphics card from moving, and just keep everything secure you need expandable packing foam.
 Why should you use expandable packing foam inside your gaming PC when you move? It’s no secret that modern graphics cards are heavy, very heavy – even when just sitting still under your desk, the weight of a graphics card can warp your motherboard. If you use a graphic card support, you know what I mean. If you don’t use a graphic card support, you really should (I use this one).
The best and most affordable packing foam I have found and use is this one on Amazon. It comes in multiple sizes from 15″x18″ all the way to 25″x27″. A full ATX PC case is about 12″ x 9.6″ and you may think “don’t I need something smaller than the case” the truth is you need something a little bigger because it needs to expand and fit around your components.
How to use expandable packing foam when you move your Gaming PC
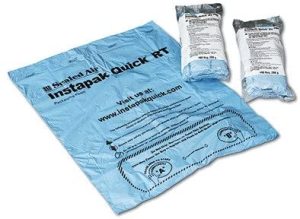
Please read all the instructions first before you begin, you need to move fast. If you’re wondering what size pack to use, start with something smaller first (like this one). It’s better to use multiple small packs to get the best results. Large packs can expand in odd ways or be difficult to remove.
- Unplug the power on your PC and lay it down flat.
- Remove the main/large access panel (typically the glass one).
Tip: Keep the access panel close because you need to put it back on quickly to get the best results.
- Unroll and lay the expanding packing foam pack on a flat surface near your gaming PC.
- Quickly alternate tapping on the areas marked A and B on the expanding foam pack until you hear a pop.
Tip: The bag will start expanding immediately after the pop! Be prepared to move quickly when this happens.
- Gently, but quickly put the bag inside your PC making sure to pack push it in and around your graphics card and over your processor. Don’t press hard, don’t force anything, and be careful not to break the bag – but speed is of the essence!
- Quickly put the access panel back on to the side. This helps encourage the bag to expand and wrap in the direction of the components you want to protect.
- After 2-3 minutes, remove the access panel and check your PC. The expandable foam packaging should now fully protect your PC. If you need additional protection or feel it didn’t cover enough, you can go ahead and repeat from step 3 above.
- Re-attach the side panel as per usual e.g. screw it back on, etc.
- You’re done!
Removal is just a case of opening your case and gently pulling out the expanded foam packet. Always be gentle when you remove it so you don’t damage anything.
Any and all advice, guides, and reviews are unbiased and based on my personal experience. If you buy through affiliate links, I may earn commissions, which helps support my website. This does not have an impact on posts or my opinion of any reviewed products. If you find this post helpful and want to say thanks, please buy me a coffee or take a look at my book on Amazon. It keeps this page ad-free. Thank you!